
How to Install Truck Fenders: A Step by Step Guide
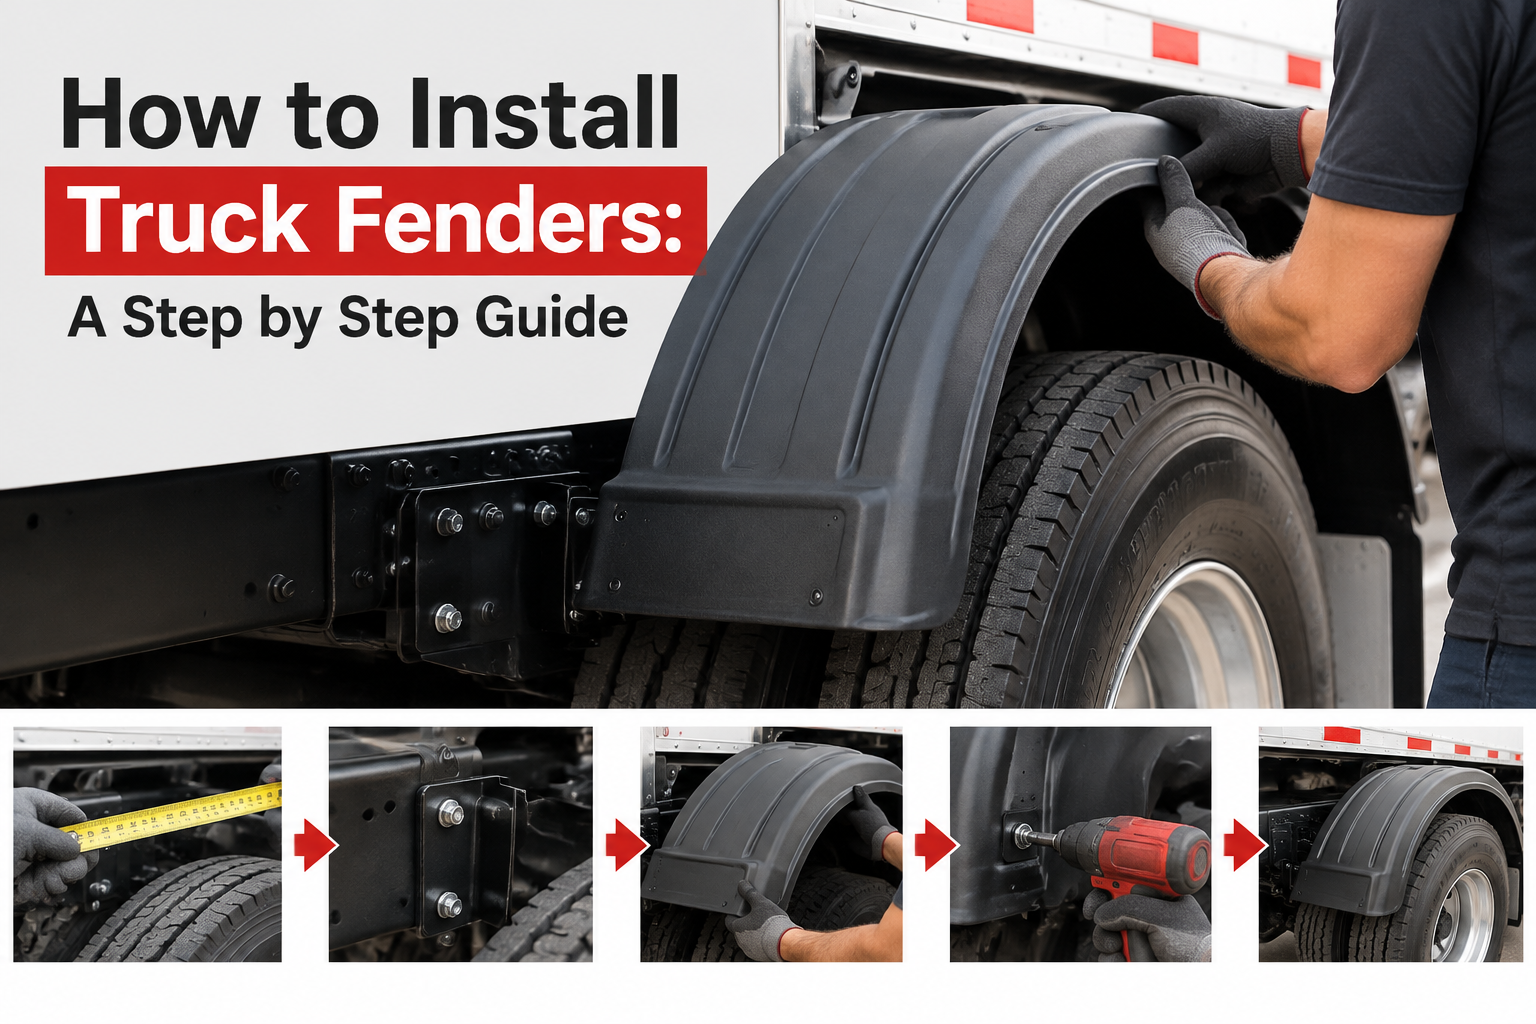
Table of Contents
What you need, the full process, and the one mistake that cracks poly fenders around the bolt holes.
QUICK ANSWER Most fender installations take one to two hours per side with basic hand tools. Park on level ground and chock the wheels, spray penetrating oil on the old fasteners and give it time to work, remove the old fender, then inspect the brackets and offset pipes before fitting anything new. Dry fit the new fender and check clearance before you tighten anything. The one thing that catches people out with poly fenders is overtightening. Poly is not steel and it will deform or crack around a fastener if you torque it like one. Use flat washers to spread the load, snug the fasteners rather than cranking them, and re-check after a few hundred kilometres.
Fender replacement is one of the more approachable jobs on a truck. It is bolt on work, it needs no specialist equipment, and most owner operators can do it in an afternoon.
What separates a clean install from one that rattles loose or cracks in the first winter is mostly preparation and knowing how poly behaves differently from steel.
What you need
| Item | Why |
| Socket set and wrenches | Bracket and fender fasteners, sizes vary by setup |
| Penetrating oil | Old fasteners in salt country need soaking before you touch them |
| Anti-seize compound | On reassembly, so the next person is not fighting your bolts |
| Drill and bits | If mounting holes need to be made or enlarged |
| Tape measure and marker | Clearance checks and hole positions |
| Wheel chocks | Non negotiable safety item |
| Flat washers | Spread load on poly so fasteners do not pull through |
| Safety glasses and gloves | Drilling, rust, sharp edges |
| A second person | Optional but useful for holding a full fender while you start bolts |
You will also want your mounting hardware sorted before you start. Old brackets and offset pipes are frequently more corroded than they look once the fender is off, and a job that stalls at the hardware store is a job that takes a weekend instead of an afternoon. See matched mounting hardware kits.
Before you start
1. Park on level ground and chock the wheels. You will be working close to tires and applying force to fasteners. This is the whole safety brief and it matters.
2. Soak the old fasteners with penetrating oil and leave it for at least fifteen to thirty minutes. In salt country this single step is the difference between unbolting a fender and snapping studs off in a bracket.
3. Check you have the right fender before you remove anything. Compare the new one against the old for radius, width and mounting pattern while the old one is still on the truck as a reference.
4. Have your hardware ready. If you are reusing brackets, inspect them first. If they are pitted, bent or heavily corroded, replace them now rather than discovering the problem with the fender already off.
The installation
STEP 1 · Remove the old fender
Support the fender with one hand or have someone hold it, then work the fasteners loose from the brackets. Start with the fasteners furthest from you and leave one in place near the middle until last, so the fender does not drop unexpectedly. If a fastener is seized, more penetrating oil and patience beats force, since a snapped stud turns a one hour job into a much longer one.
STEP 2 · Inspect the brackets and mounting points
This is the step most people skip and it is the one that determines whether your new fender lasts. Look at the brackets, offset pipes and the frame mounting points for corrosion, cracking, elongated holes and bending. A bent bracket will hold the new fender at the wrong angle, and a corroded one will fail while the fender is still fine. Replace anything questionable now.
STEP 3 · Fit the mounting hardware
Install brackets and offset pipes loosely at first, without fully tightening. You want the ability to adjust position once the fender is dry fitted. Apply anti-seize to the threads as you go. Getting the hardware roughly positioned before the fender goes on is far easier than adjusting it afterwards.
STEP 4 · Dry fit the fender
Offer the fender up and hold it in position without fastening it. Check that the coverage sits where you want it over the tire, that the fender is level, and that it lines up with the fender on the other side. Look at it from a few feet back as well as up close, because a fender that looks straight from underneath can sit visibly crooked from the side.
STEP 5 · Check clearance, including under compression
With the fender held in position, check the gap between the fender and the top of the tire. Then push down on the suspension or account for its travel, because a fender that clears beautifully with the truck sitting level can contact the tire under load on a rough road. That contact wears a groove in the fender and a wear mark on a tire you paid for.
STEP 6 · Mark and drill only if needed
If your fender and hardware are matched, holes should line up and no drilling is required. If you do need to drill, mark carefully, drill from the finished side to avoid tear out, and consider making the hole slightly larger than the fastener. Poly expands and contracts with temperature, and a small amount of movement room prevents stress building at the fastener over a Canadian winter.
STEP 7 · Fasten, without overtightening
Use a flat washer under each fastener head to spread the load across a wider area of the poly. Bring fasteners up snug rather than torquing them down hard. Poly is not steel and it will deform, dimple or eventually crack around a fastener that has been overtightened. Work across the fender rather than doing one end at a time, the same way you would tighten a wheel, so it seats evenly.
STEP 8 · Final check and re-torque later
Step back and confirm the fender is level, matches the other side, and has consistent clearance. Then make a note to re-check the fasteners after a few hundred kilometres. Vibration settles everything in, and a five minute check at that point prevents a fender working loose on the highway.
| THE MISTAKE THAT CRACKS POLY FENDERS Overtightening. People who have installed steel fenders for years torque poly the same way, and the fastener pulls into the material. It may look fine on the day and crack around the hole after a winter of vibration and cold. Snug is correct. Flat washers spread the load. If the poly is visibly deforming around the washer, you have gone too far. |
How long it takes
| Situation | Time per side | Notes |
| Straight swap, sound hardware | 45 to 90 minutes | Fasteners come loose cleanly, brackets reused |
| With new mounting hardware | 1.5 to 2 hours | Bracket positioning adds time |
| Seized or snapped fasteners | Add 1 to 3 hours | The most common cause of a job overrunning |
| Drilling new mounting holes | Add 30 to 60 minutes | Measure twice, drill once |
| First time doing it | Add 30 minutes | Mostly spent on the first side, second goes faster |
| Fenders and matched hardware, shipped from Manitoba. Heut LTD manufactures medium density poly truck fenders and mounting hardware kits engineered to fit them. Domestic shipping, no border delays, and a limited lifetime warranty. Shop fenders and kits at heut.ca |
Common problems and how to fix them
| Problem | What to do |
| Fastener is seized solid | More penetrating oil and time. Heat is an option on steel brackets, but keep it away from the poly entirely |
| Stud snapped off in the bracket | Extract it, or replace the bracket. Do not try to run the fender on remaining fasteners |
| Holes do not line up | Check you have the right fender for your configuration before drilling anything new |
| Fender sits crooked | Loosen the hardware, reposition, and check against the other side before retightening |
| Rubbing at full suspension travel | Clearance is too tight. Reposition the bracket rather than trimming the fender |
| Fender rattles at speed | Fasteners not seated evenly, or a bracket is loose. Re-check and re-torque |
| Poly deformed around a bolt | Overtightened. Back it off, add a flat washer, snug only |
When to hand it to a shop
Most fender jobs are straightforward. A few are not, and it is worth knowing the difference before you start.
- Frame mounting points are cracked or corroded through. Structural repairs are not a driveway job, and a fender bolted to a compromised mount will fail.
- Multiple fasteners have snapped. Once studs are breaking off, you are into extraction work with the truck tied up.
- You are changing fender style or configuration. New mounting geometry may need fabrication rather than bolt on hardware.
- The truck is under a fleet maintenance agreement. Documentation requirements usually mean the work needs to go through an approved shop.
Common questions
How do I install truck fenders?
Park on level ground and chock the wheels, soak the old fasteners with penetrating oil, then remove the old fender while supporting it. Inspect and replace brackets and offset pipes as needed, fit the hardware loosely, dry fit the fender and check clearance including under suspension compression. Fasten with flat washers, snug rather than fully torqued, then re-check after a few hundred kilometres.
How long does it take to install truck fenders?
Around 45 to 90 minutes per side for a straight swap with sound hardware, or one and a half to two hours per side if you are fitting new brackets and offset pipes. Seized or snapped fasteners are the most common reason a job overruns and can add one to three hours. Allow extra time on the first side if you have not done it before.
How tight should truck fender bolts be?
Snug, not fully torqued. Poly fenders are not steel and will deform or crack around a fastener that has been overtightened, sometimes only becoming visible after a winter of vibration. Use a flat washer under each fastener head to spread the load, tighten progressively across the fender rather than one end at a time, and stop if the poly is visibly deforming around the washer.
Why did my fender crack around the bolt hole?
Almost always overtightening, sometimes combined with no washer to spread the load, and occasionally from a hole drilled too tight to allow for thermal movement. Poly expands and contracts with temperature, so a fastener clamped hard into it builds stress that shows up as cracking after cold weather and vibration. Snug fasteners, flat washers and slightly oversized holes prevent it.
Do I need to replace the mounting hardware too?
Usually worth it. Brackets, offset pipes and fasteners take the same salt and vibration the fender did, and old fasteners frequently seize during removal. Discovering a corroded bracket with the old fender already off is what turns an afternoon into a weekend. A matched hardware kit also removes the geometry problems that come from mixing components from different sources.
Can I install truck fenders by myself?
Yes for most jobs, though a second person makes holding a full or tandem fender considerably easier while you start the first fasteners. Poly fenders are light enough to handle alone. Get help or use a shop if frame mounting points are damaged, multiple fasteners have snapped, or you are changing fender style and need different mounting geometry.